
I recently switched to macOS because I wanted to move away from Windows because … reasons.
I knew Shortcuts from iOS before, but didn’t really create one myself. I started experimenting with Shortcuts on macOS because I had a simple use case where a Shortcut would make my life easier.
Maybe that’s interesting to you too.
Use case: Upload file via scp and copy public URL to clipboard
Background
I like to use PKM tools like logseq, remnote, notion, obsidian and so on. Sometimes it’s not practical to store larger files there, because it would clutter the backup or because of provider limitations.
For example I want to backup an awesome podcast episode or YouTube video about a niche topic that might disappear from the internet one day. Then link it on the page about that niche topic.
For this I have a container based web server with a self hosted authentication portal (Authelia). This means I have to login one time and after that I can access those files like regular public links.
I made it this way so that I’m able to move the underlying storage provider and that I “own” the links so they can never change.
Example link format: https://files.27p.de/2023-08-04-12-32-046.mp4
How I would have done it before
Either scp, bash/python script or tools like WinSCP or Cyberduck.
Required steps to do this
- select file to upload
- rename the file to have consistent file names
- select server to upload the file to
- select user for that server
- select target path
- concatenate target filename with public URL
https://files.27p.de/+2023-08-04-12-32-046.mp4 - copy link to clipboard to paste it somewhere
Those are repetitive tasks I tried to get rid of.
The Shortcut
Warning: This is my very first macOS shortcut. It works, but I’m sure this can be optimized.
Prerequisites: Shortcut settings
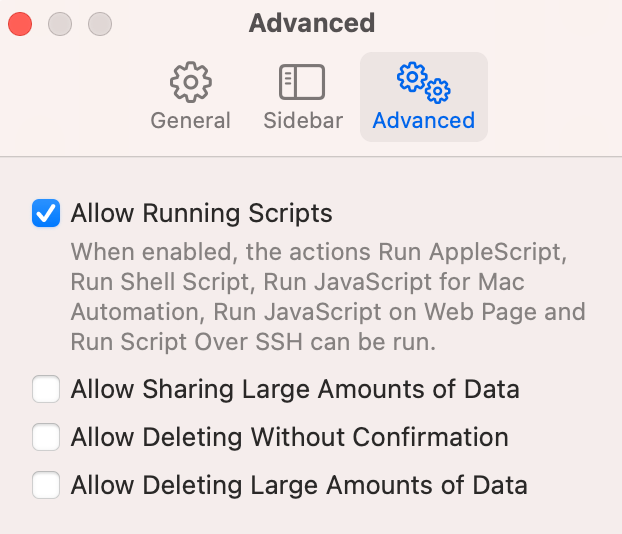
The shortcut uses a shell script command. “Running scripts” has to be enabled.
Later I want to be able to select the file I want to upload this way:
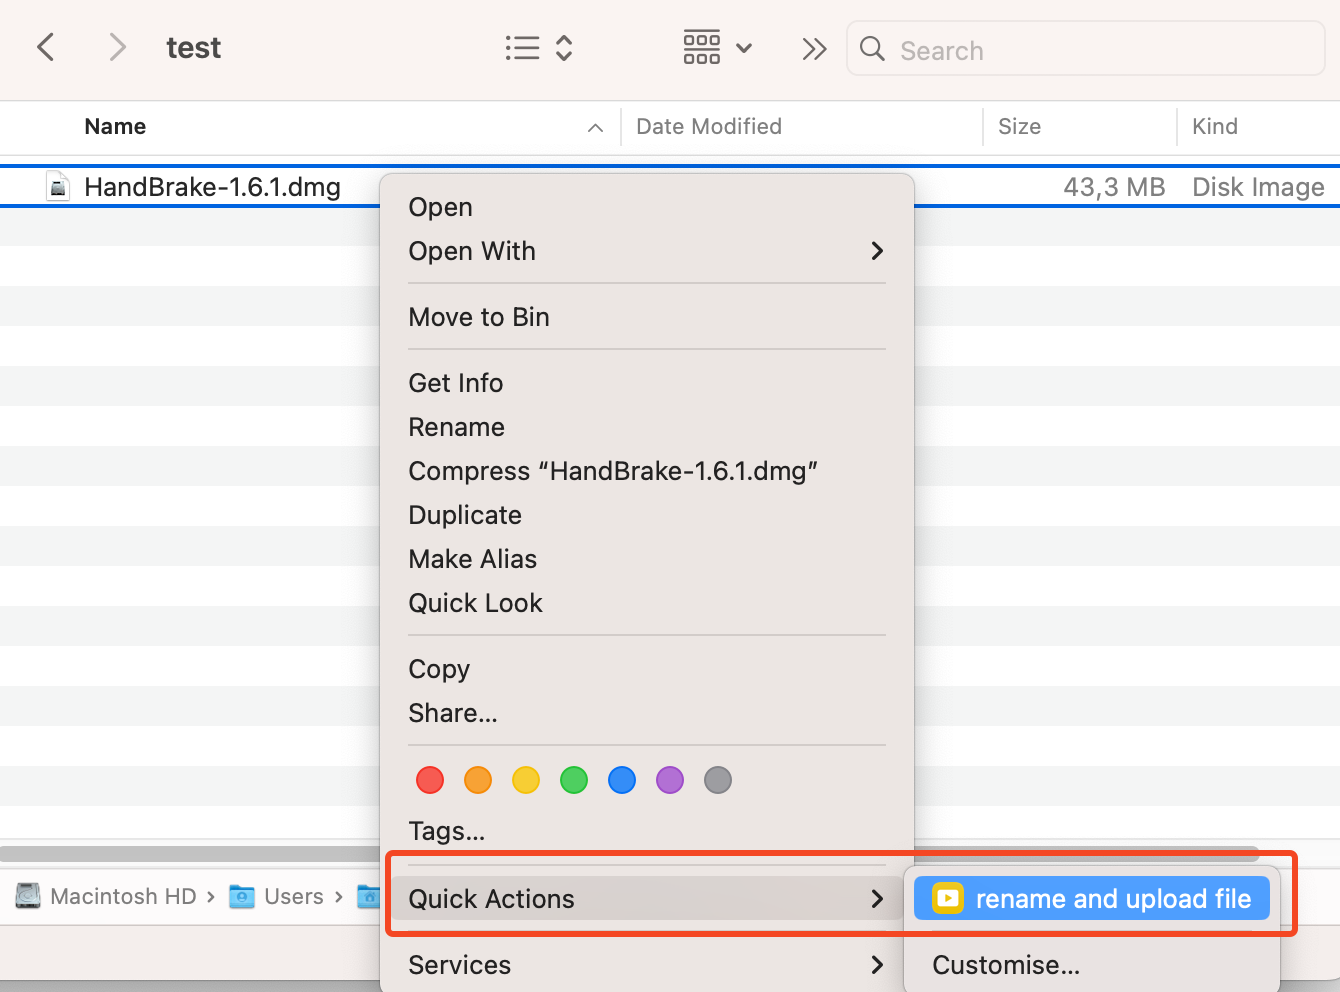
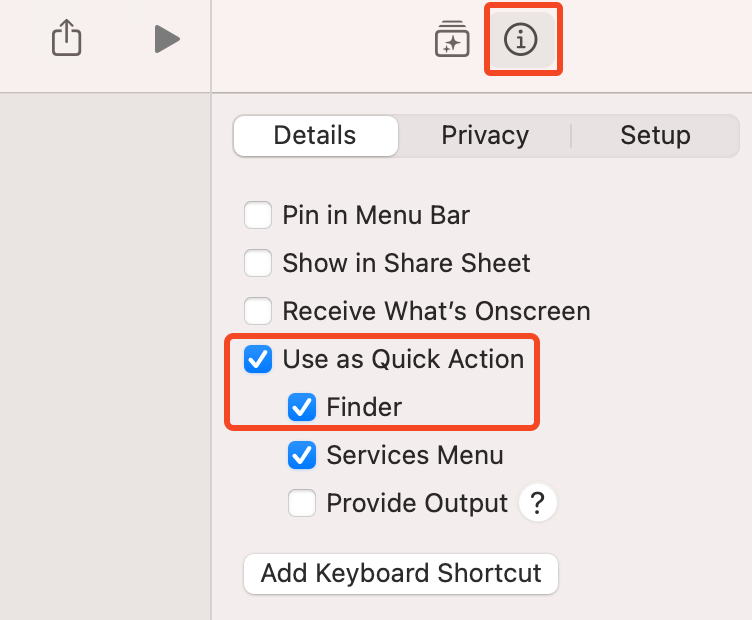
For this to work I have to enable “Use as Quick Action” in the shortcut itself. Selecting the checkbox adds the top section (input from Quick Actions) to the shortcut.
When you first create and execute the shortcut later there will be some privacy prompts, asking for permissions like using the shell and connecting to your remote server.
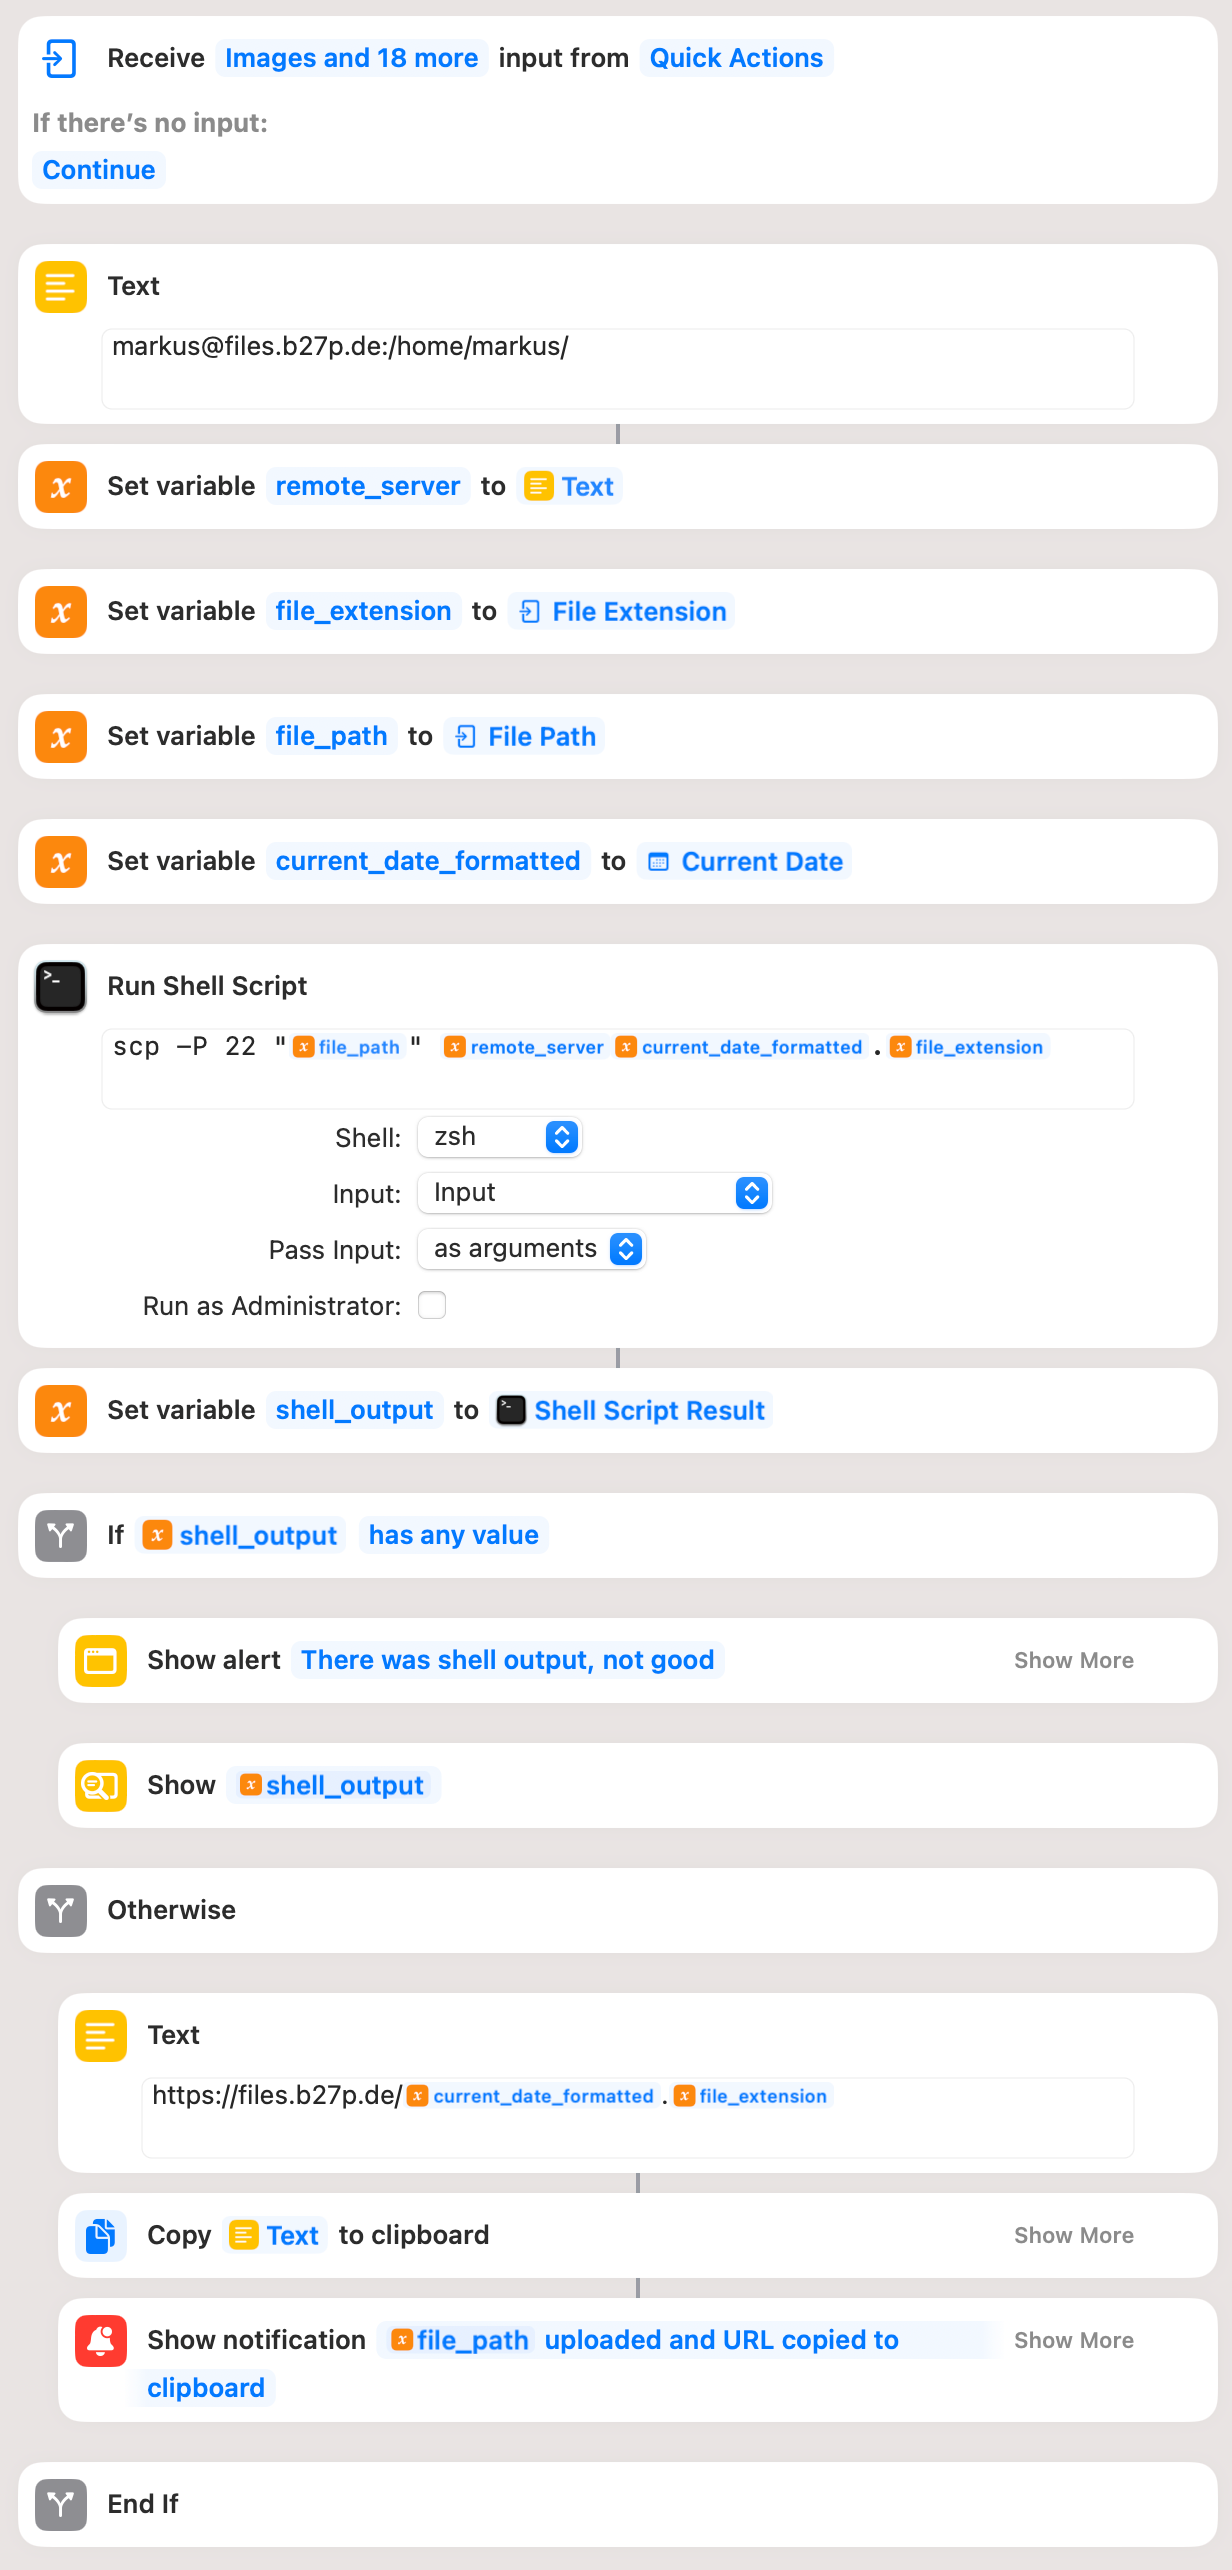
Step 1: Setup variables

The first text is the string for the target user, server and path. You could store separate variables so it’s easier to adapt for several servers. But this is v.0.0001 so it’s a little bit scuffed.
I use the variable remote_server to store this text.
Then I store the file extension in file_extension and the path in file_path. Which are properties from the “Shortcut info”.
I wanted to have the current date and time like this 2023-08-04-12-32-046.mp4 as a file name.
You could also easily do hashes or something else instead.
To do it with the date format, you can enter a custom format like this
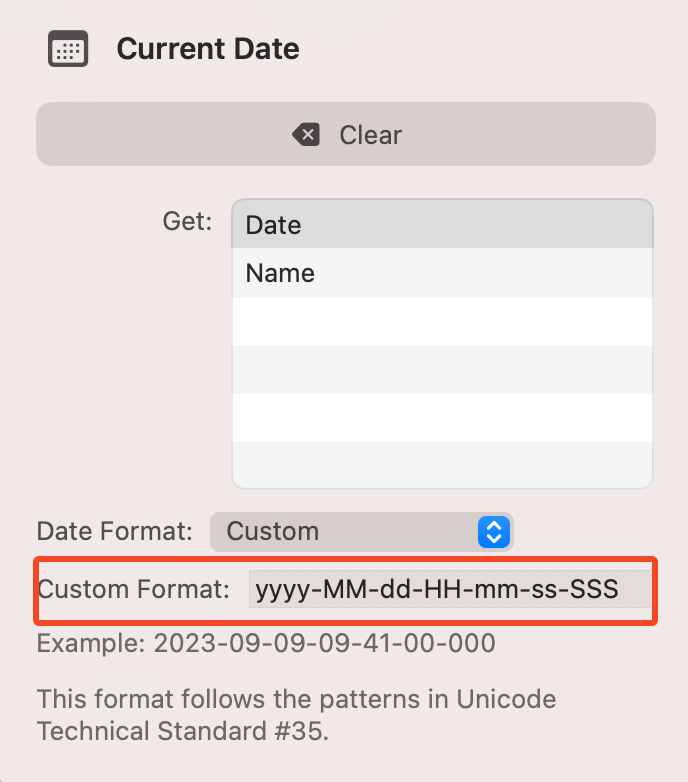
yyyy-MM-dd-HH-mm-ss-SSS
Step 2: The scp command
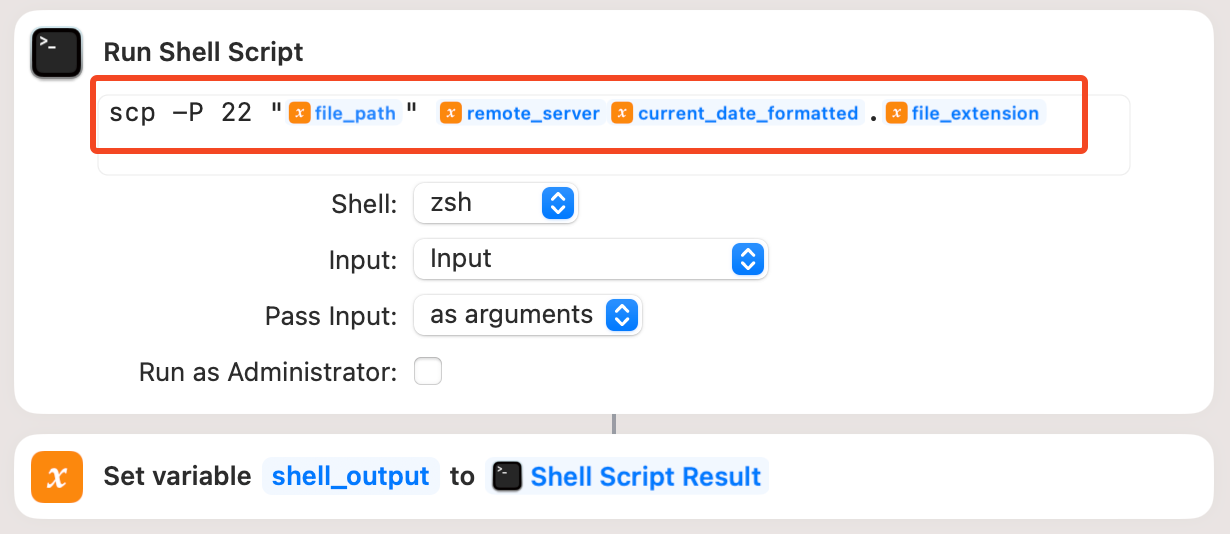
With the input form from “Run Shell Script” there is auto complete, as soon as you start typing the variable name.
So when the shortcut executes this command in the background, it would look something like this:
scp -P 22 "/Users/markus/Helpful Youtube Video.mp4" markus@files.b27p.de:/home/markus/2023-08-04-12-32-046.mp4
I added -P 22 in case I want to change the default ssh port later.
This command shouldn’t generate output if it succeeds. Output is stored in the variable shell_output
Step 3: Check if it failed
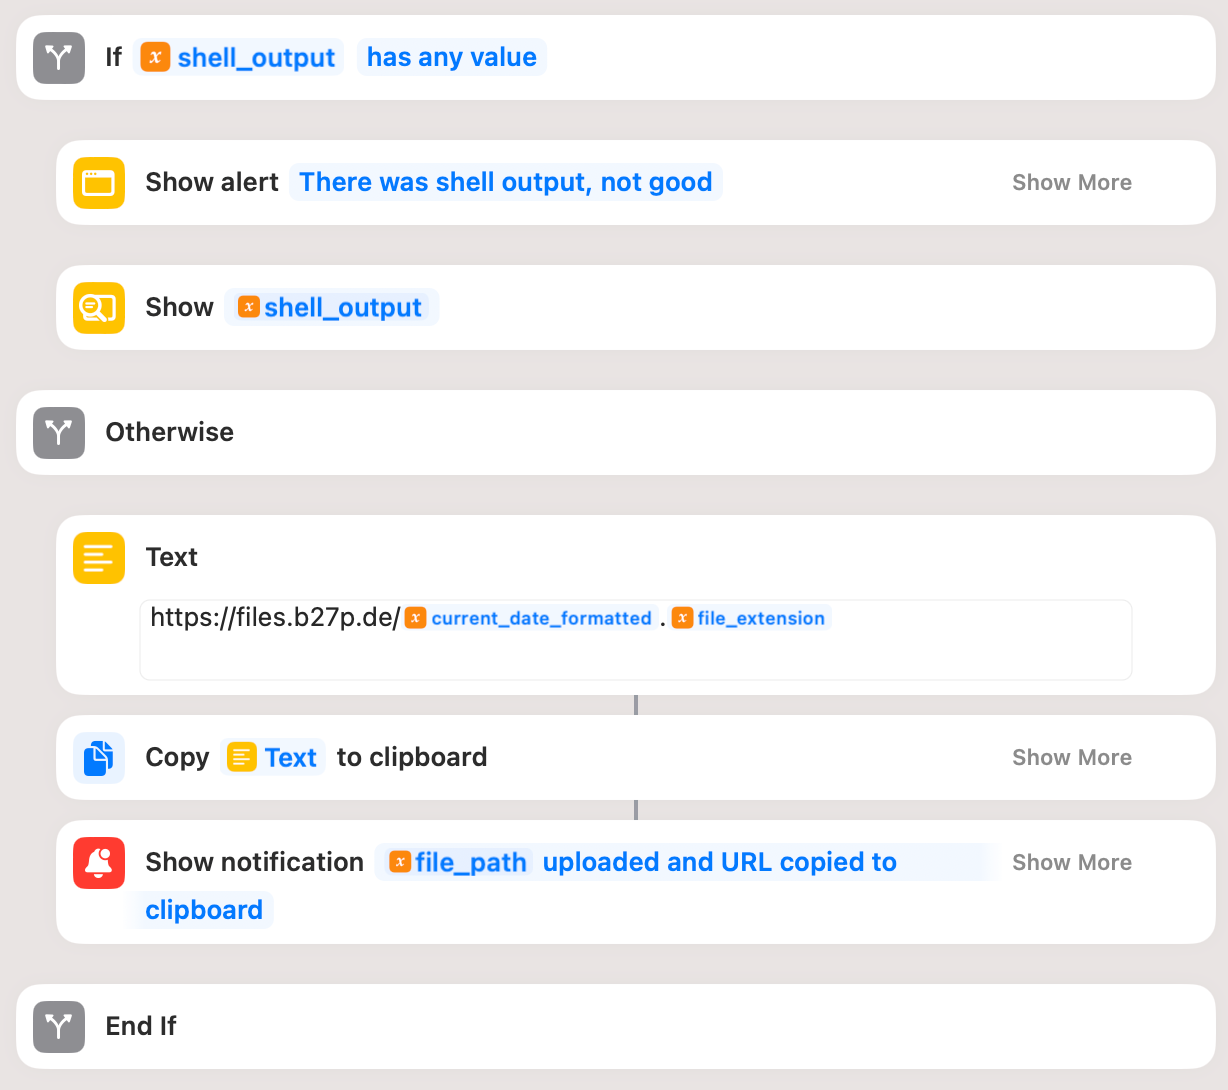
With if I check if there was output. If there was, the scp upload failed and I output an alert, then show the shell output.
If there is no shell output I concatenate the URL with the new filename, copy that text to the clipboard and show a notification.
Full shortcut view
Conclusion
I can now select a file, click on my shortcut and a few seconds later I have the public URL to that file in my clipboard.
There sure are already tools for this kind of task. And for my shortcut there is obviously room for improvement, like checking if the file upload really was successful and so on. But it was cool being able to easily create this with only macOS native tools within a pretty short time frame.
After writing this post, I already did my second shortcut where I can select any video file as input. Then click the shortcut and ffmpeg converts it to a h.264 mp4 file.
I like how you can integrate scripting so well with the Desktop experience.