
I like to play around with the open source network emulator GNS3 and I wanted to share some advice about how to improve the GNS3 cloud node.
Info: The suggested solution requires you too add a dedicated GNS3 lab network on your main router or firewall
Cloud vs NAT node

Out of the box there are two important nodes in GNS3.
The NAT node offers a super easy way to connect to the internet through the GNS3 server. You’ll get a DHCP address and you’re ready. GNS will do everything for you.
With the Cloud node you can connect your lab nodes to any interface on the GNS3 server. Most often this will be used to directly access management interfaces from any machine in your “real” network. Otherwise you’d have to connect to your lab via telnet, VNC or SPICE.
So the major difference: With the NAT node you can easily connect to the outside, but not the other way around. The cloud node is just like connecting your GNS3 internal lab to the switch that your GNS3 host is attached to.
Example
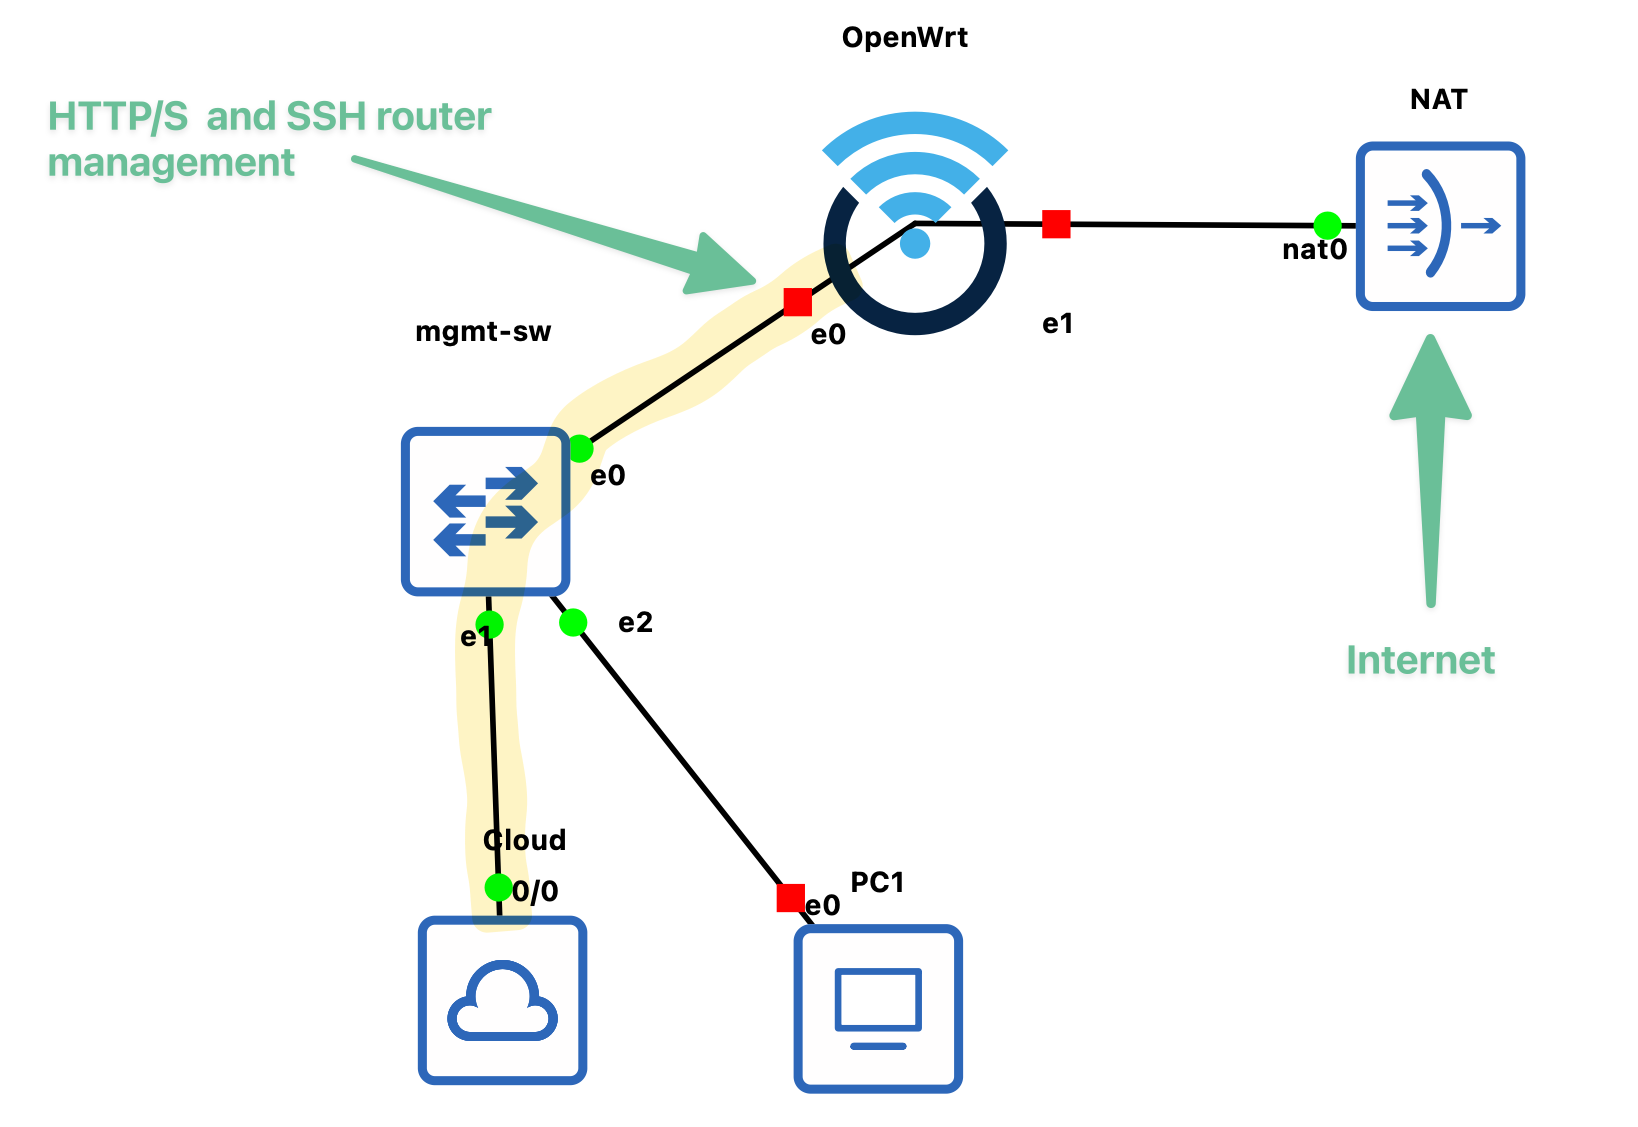
In this example you can see that we could use “PC1” to connect to the management interface of OpenWrt (if it was a Linux or Windows node for example). But this would be an extra jump, we’d always have to open a telnet or VNC session and then access the router interface from there, which might be clunky in some cases. Also this requires extra resources, because you have to run some kind of jumphost to get into your lab network.
But because we connected it with the “Cloud node” we can connect the lab network to our main GNS3 host node network. Meaning: you can connect to the Lab from your main machine directly. This works out of the box. But there is a problem….
The problem with the cloud node: Speed
Unfortunately the cloud node can be very, very slow. This has been reported many times in the community. Fast enough to run a RDP session, too slow to update VMs or copy over images.
Solution: Extra interface with bridge
One solution for this is to add a bridge to the interface. But I want to go one step further: Separate the GNS3 network itself (the IP you’re using to connect to GNS3) and the hosts you’re exposing in your GNS3 lab network by adding a second interface and bind a bridge to that:
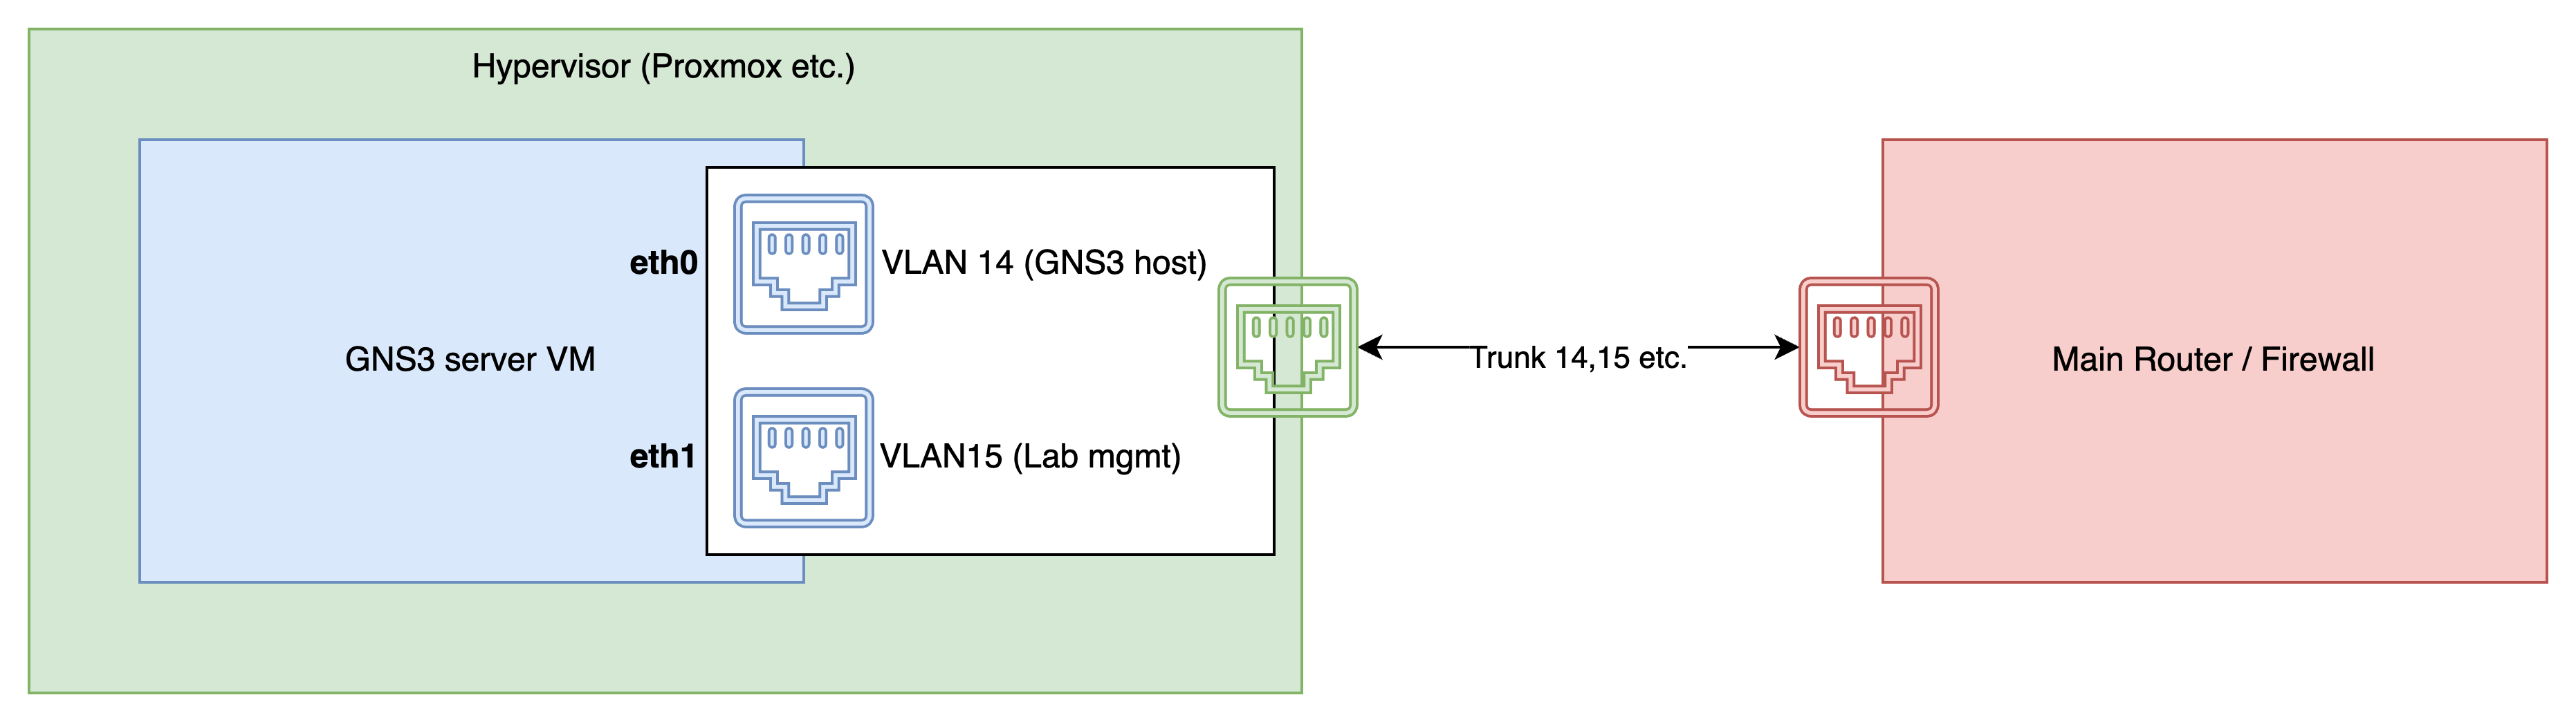
With proxmox you would add a second interface like this
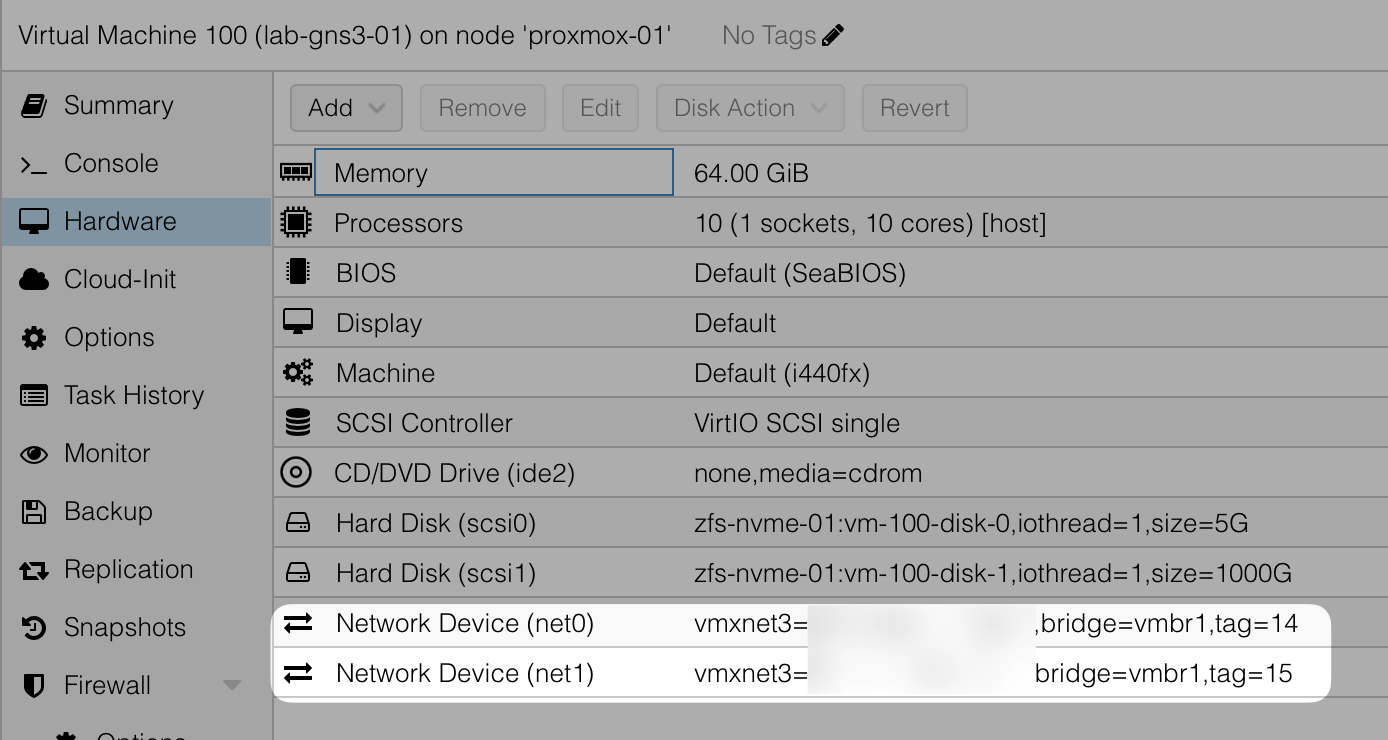
On VLAN 15 you would configure the GNS3 internal lab network, preferably with a DHCP server, so that when you connect a node in GNS3 it will automatically receive an IP address. The VMware vmxnet3 model worked best with my testing.
And within GNS3 CLI you would modify /etc/netplan/90_gns3vm_static_netcfg.yaml (eth0 and eth1 might have different names in your setup)
network:
  version: 2
  renderer: networkd
  ethernets:
    eth0:
      dhcp4: yes
      dhcp-identifier: mac
    eth1:
      dhcp4: no
  bridges:
    br1:
      dhcp4: no
      interfaces:
        - eth1
What this basically does is:
- keep the default setting for
eth0- The GNS3 server will request an IP address via DHCP - add interface
eth1and bind bridgebr1to it- Notice neither the bridge
br1noreth1has an IP address. The GNS3 server already gets an IP address oneth0via DHCP and we don’t need another for the GNS3 host itself.
- Notice neither the bridge
When you add a cloud node in GNS3 it would look like this now
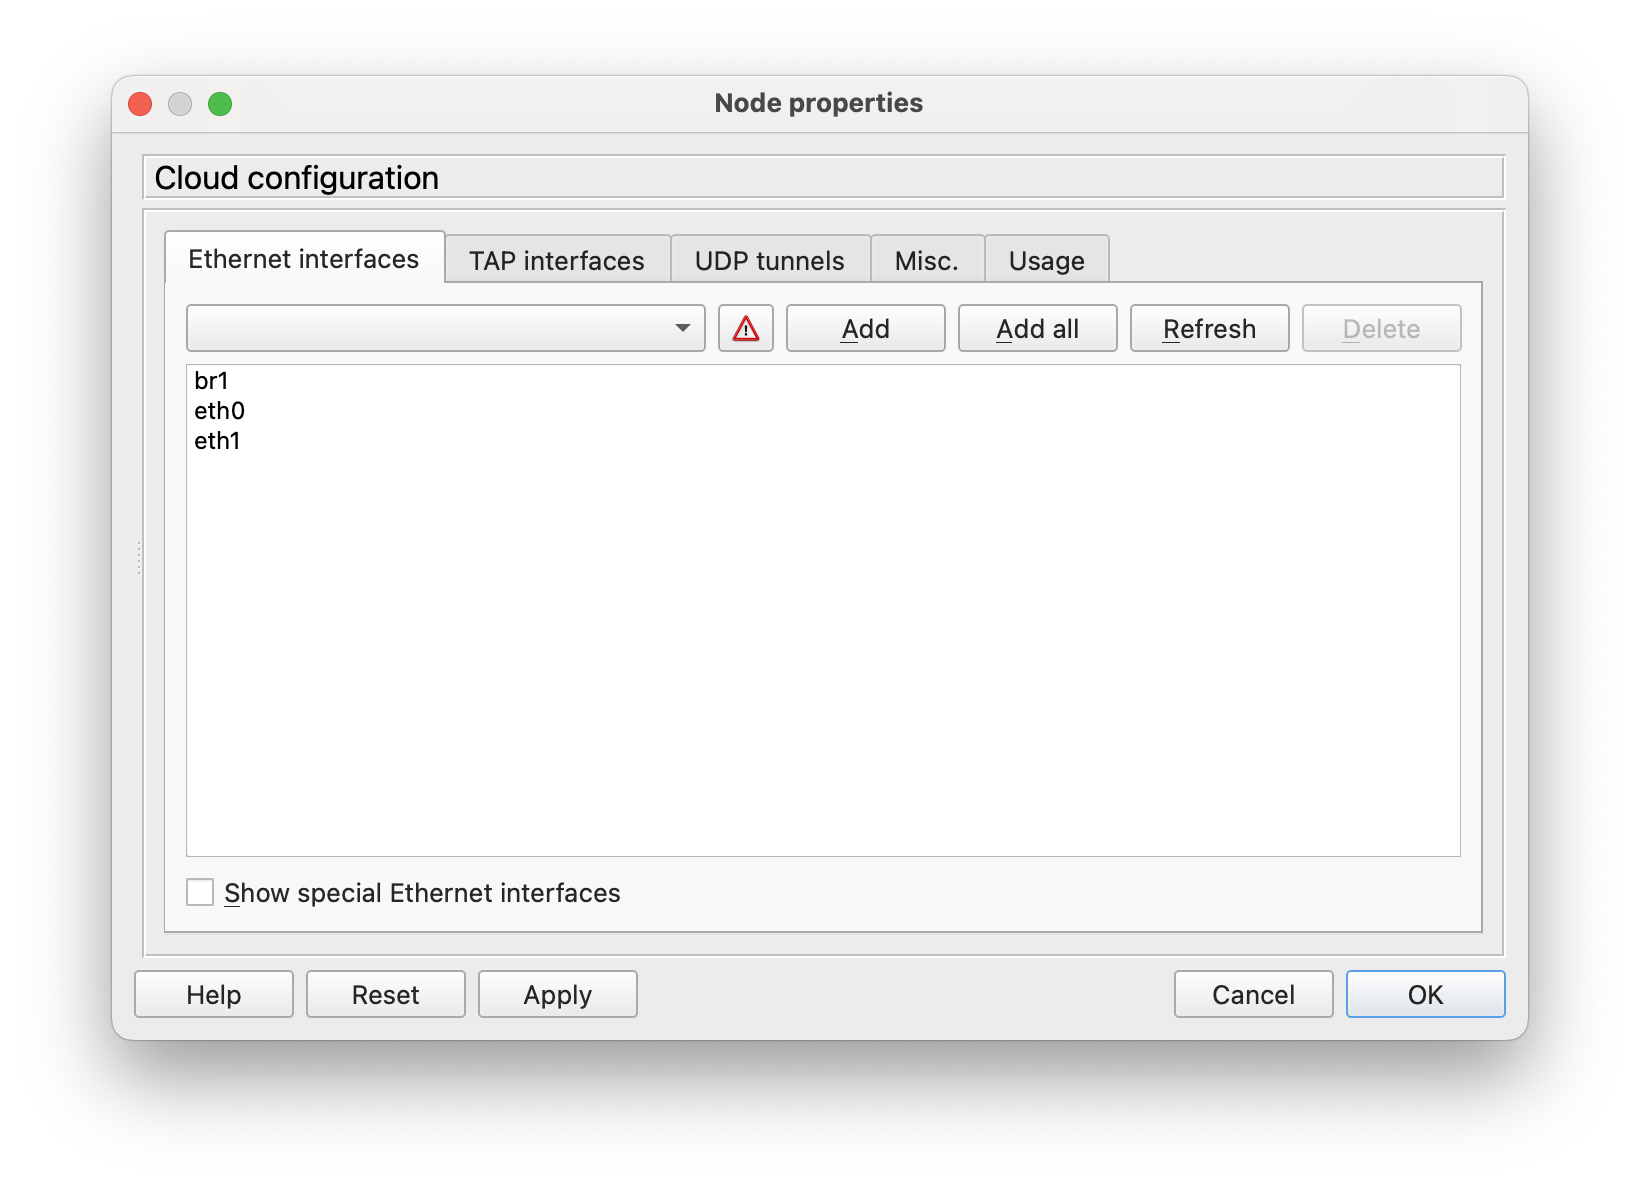
Now you can connect a GNS3 node to br1 and it will receive an IP address from your “real network”. (VLAN 15 in this example). Assuming you can reach VLAN15 from your workstation you can now access all the management interfaces via any protocol you like with a decent speed. (usually ssh, RDP and so on)
And when you set it up this way you can build fancy firewall policies, so that nodes within GNS3 can never initiate traffic to your main network where your workstation lives; while maintaining the possibility to connect directly to nodes within your GNS3 lab.