
Recently, I was gifted an older monitor intended to be used as a mobile second monitor for a notebook or tablet. I don’t need it for that purpose, but I saw that the monitor had low power consumption, and I always wanted a dedicated “monitoring” screen. This was a perfect match.
Computer and OS
I had a spare Raspberry Pi 4 which would be a good companion. It has two micro HDMI outputs. The operating system is Raspberry Pi OS 64 bit.
This whole process might very well also work with other systems, but because there are some factors like Wayland, the process might differ.
What’s on the monitoring screen?
A dedicated dashbard for Checkmk in a browser. It shows the time, the status of my firewall/router, the status of an important tunnel and externally hosted servers. I’m also thinking about rotating tabs to have some more external sources on there.
The problem
The whole purpose of this low power consumption monitor was to keep it on all the time (it costs less than a dollar each month), but it still felt wrong to leave it on when nobody was around.
So I thought about integrating it into my home automation setup, which runs on Home Assistant. The first idea was to just use a Zigbee plug and cut the power, but why not do it directly, if we already have a perfectly capable Linux running on the Pi?
wlr-randr
wldr-randr is a “utility to manage outputs of a Wayland compositor”. If you run it without any arguments, it will show the name of the connected port.
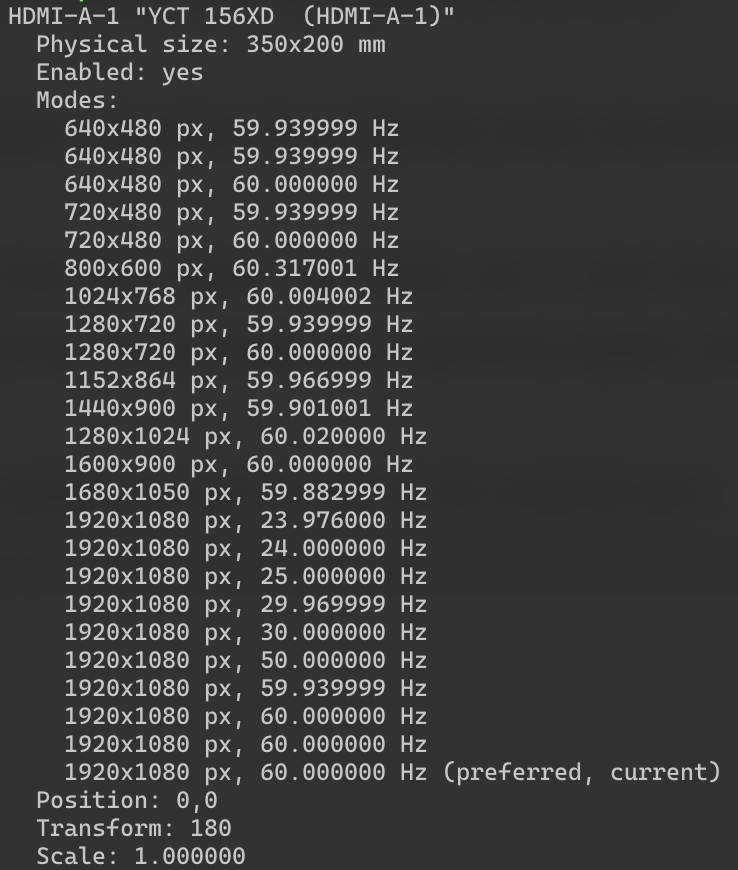
In this case HDMI-A-1
With
wlr-randr --output HDMI-A-1 --off
you turn the monitor off.
And with
wlr-randr --output HDMI-A-1 --on
you turn it on again. You can also run it with a connected SSH session as the user currently logged in to the desktop.
Prerequisites: Home assistant integration
A way to issue shell commands in home assistant is to use the Shell Command integration. It has no web UI capabilities but you can add it this way in configuration.yml:
shell_command:
  your_command_name: cat /etc/os-release
Home Assistant needs to be reloaded then.
Applied to what we want to do here the part for configuration.yml would be like this:
shell_command:
  pi_monitor_off: ssh -i /config/our-new-private-key -o 'StrictHostKeyChecking=no' user@10.10.10.10 'wlr-randr --output HDMI-A-1 --off'
  pi_monitor_on: ssh -i /config/our-new-private-key -o 'StrictHostKeyChecking=no' user@10.10.10.10 'wlr-randr --output HDMI-A-1 --on'
I’m using the Home Assistant Operating System, which would make it a bit trickier to store the ssh key-pair in a default location (due to docker segmentation). This is why I decided to store the key in the config directory, which is always stored persistently.
By using StrictHostKeyChecking=no, you avoid the need to interactively check the host key of the server.
Note: For security reasons, I recommend creating a dedicated key-pair just for Home Assistant, with the least privileges necessary for the accounts it accesses.
The command to create the key-pair can be something like
ssh-keygen -t ecdsa -b 521 -f /your/path/to/config/our-new-private-key
Home assistant integration
To avoid unnecessary complexity, I’ll skip the details of my specific setup. Here is a simple automation that should work for testing:
alias: pi_monitor_off
description: ""
triggers:
  - trigger: state
    entity_id:
      - input_button.button_pi_monitor_off
    to: null
conditions: []
actions:
  - action: shell_command.pi_monitor_off
    data: {}
mode: single
Web UI version would be:
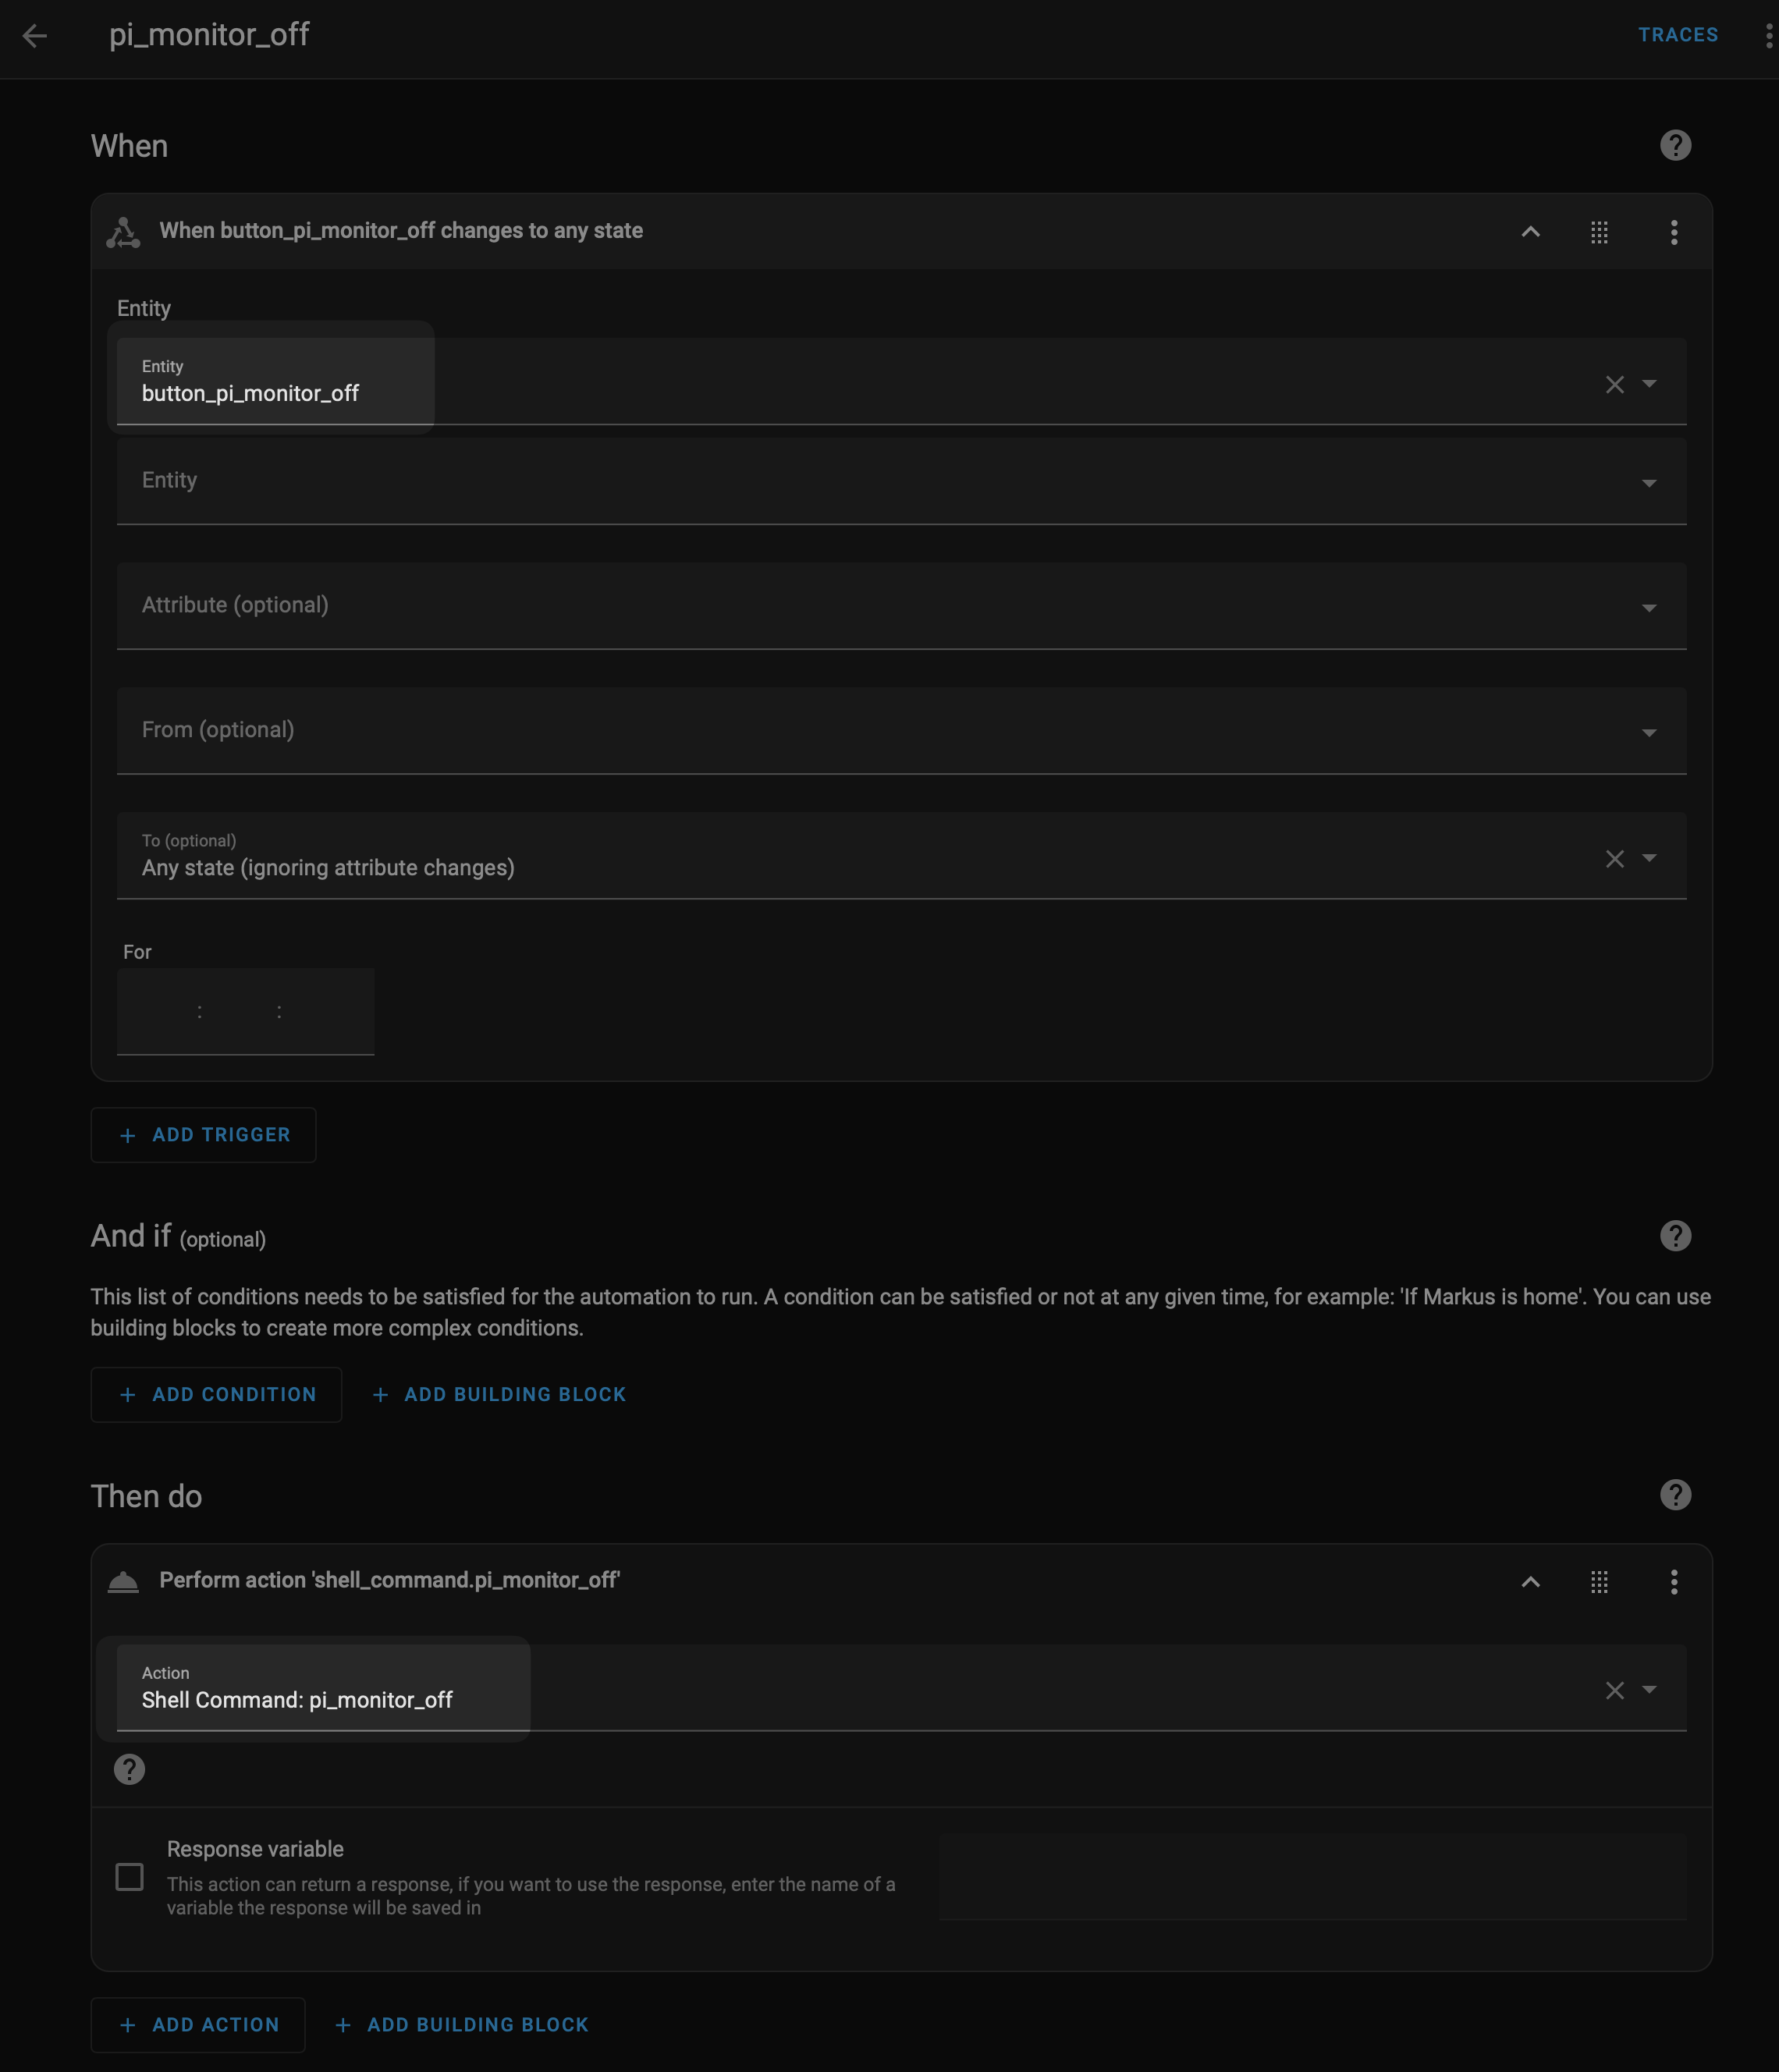
I used a helper button (here: input_button.button_pi_monitor_off) and as an action you execute the shell command that turns the monitor on or off.
For my setup it works like charm - the monitor turns black in less then a second after the automation triggers and then enters standby mode.
You can then be creative and, for example, have it only turn on when you’re at home.
Bonus: Brightness and other monitor settings
It is also possible to control the brightness in a similar way. For this the tool ddcutil has to be installed, it doesn’t come with Raspberry Pi OS.
It can send commands via the DDC/CI (Display Data Channel Command Interface) protocol. This could also turn the monitor off and on again, but it wasn’t as reliable as wlr-randr for me.
ddcutil was reliable for changing the brightness though.
apt install ddcutil
With ddcutil detect it shows if a monitor is detected.
ddcutil capabilities shows the capabilities.
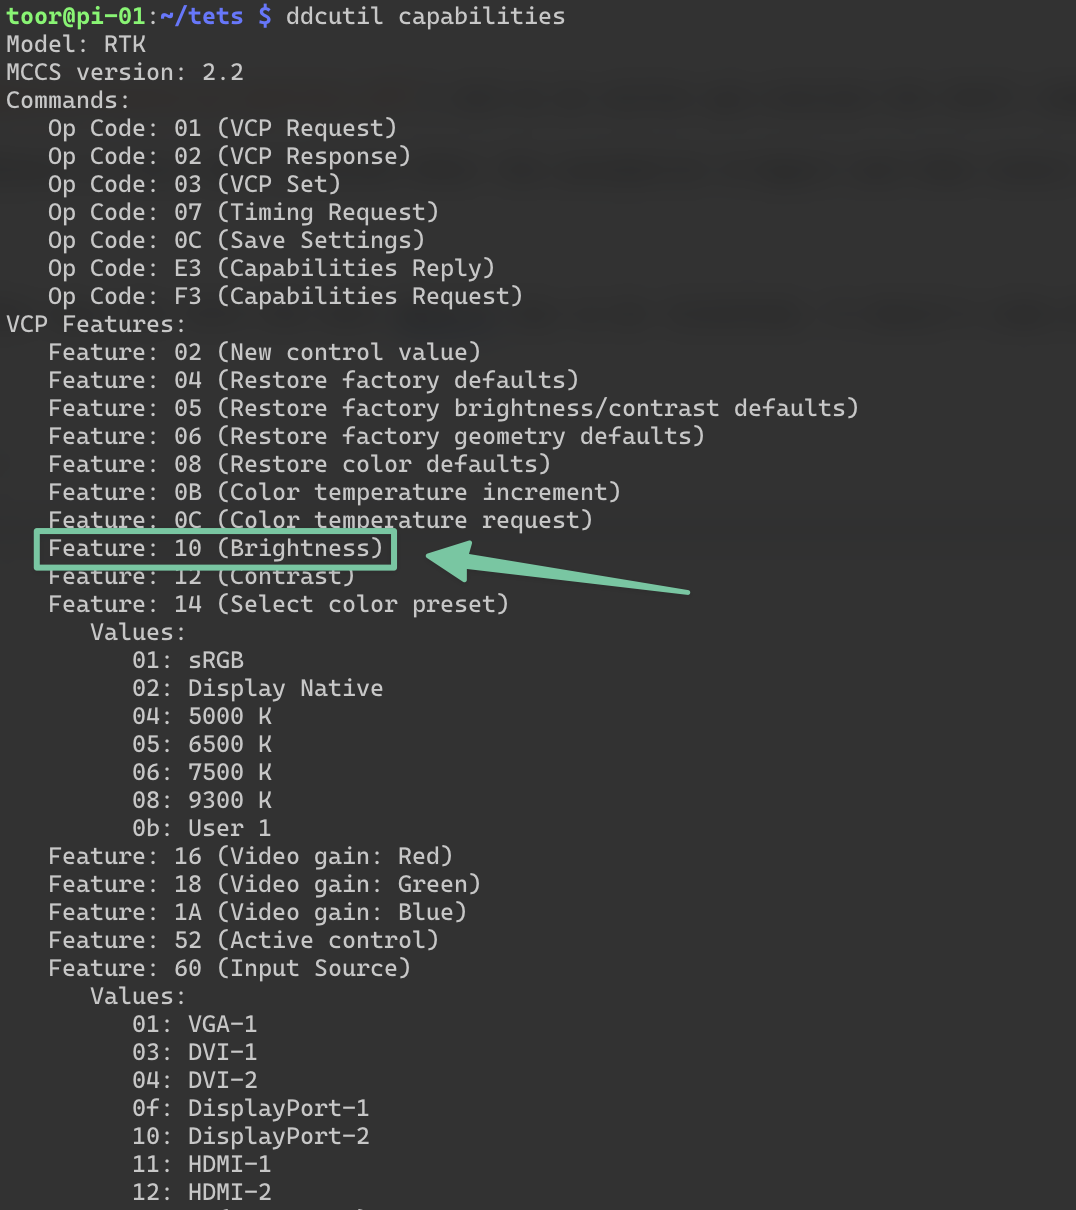
Let’s say we want to set the brightness to 42%, that would be the command
ddcutil setvcp 10 42
10 is the feature code, and 42 the brightness. If you want to confirm the setting you can query it with
ddcutil setvcp 10

Issuing the command in Home Assistant works exactly like with the wlr-randr example before.